Mapper(s)
kaoz
BK Version
OA
Player Party
GB
AI Opponent
Germany
Map Season
Summer
Map Date
1944
Map Size
16 x 16
Date Released
11/11/2023
File Size
1,614KB
Map Info
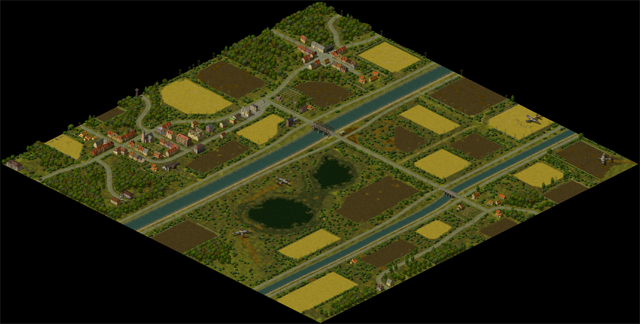
This is the first map of the 11 Hell's Corners chapter, included in the Operation Apocalypse mod.
Comments
Map walkthrough
At the start, you are commanding 4 paratroop platoons that have landed with gliders (#1/2/3/4 on the map). These 4 platoons each have a specific ScriptID, which has consequences. #1 and #2 have orders to seize the upper bridge, #3 and #4 orders to seize the lower bridge (blue bridgeheads on map). If you would try otherwise and seize the bridges with the 'wrong' platoons, the mission objectives will not complete as the scripts expects the correct ScriptID's! Yes, I could have changed this, but I haven't, as I noticed this only in the final test-phase and didn't feel like editing the Lua-script again. So don't send platoons #1/#2 to the east nor #3/#4 to the west as it might prevent you from winning the game. Just follow the mission orders and you'll be fine.
Once a bridgehead is established, an enemy counter-attack will occur. Be prepared! They're not that heavy but you don't want to be on the other side with just a single unit.
Then most of the game happens on the western bank of the canal. You need to secure some positions in two towns, which will cause some more small counter-attacks. On the easthern bank of the river, you only need to hold that position. Apart from one or two small counter-attacks, that shouldn't be too hard. Beware for a surprise attack tho', keep your eyes open!